Get Started with Volkswagen Automotive Cloud
The all-new Developer Experience is here.
We've created an all-new, feature-rich developer experience portal (the "DXP") to replace the one you're currently viewing (the "APIM portal") by the end of 2021. Discover and get started.
What is Volkswagen Automotive Cloud?
Volkswagen Automotive Cloud (VWAC) is a global cloud platform that provides a safe, smart, and scalable foundation for connected and autonomous vehicles. It is a critical component of the Volkswagen Group strategy – to build one unified software platform for all Volkswagen brands, in all regions, with all new vehicle models running on this platform by 2025. Together, Volkswagen Automotive Cloud and the Volkswagen Operating System (VW.OS) provide a secure, reliable backend infrastructure that enables Volkswagen Group brands to:
Build new products faster
Focus on creating more value for customers
Benefit from economies of scale
How does Volkswagen Automotive Cloud work?
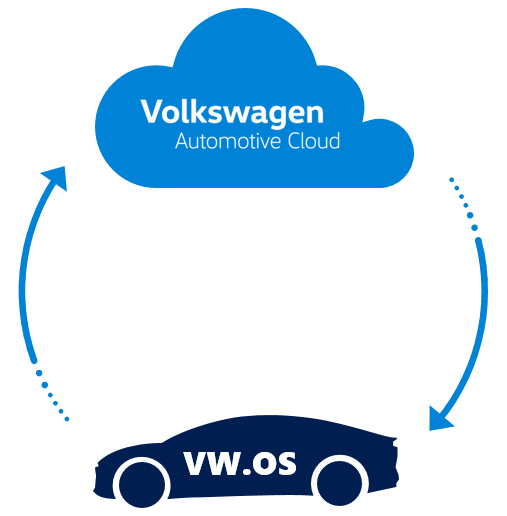
While VW.OS manages in vehicle systems (such as infotainment, battery management, cameras and sensors), VWAC securely passes information to those systems (such as updates and new features), and from those systems to the cloud.
By 2024, VWAC will ingest, store, and process data from millions of connected vehicles on roads around the world, and will enable Volkswagen Group brands to:
Harness more data from more sources, in real time
Empower teams to collaborate and analyze data in new ways
Discover opportunities to increase quality and reduce costs
Today, VWAC provides APIs that enable developers to build powerful services on top of VWAC. Use cases may include:
EV services: battery performance, long-distance trip planning, recommended charging stations
Safety and emergency services: roadside assistance, vehicle problem alerts, roadside hazard identification
Remote control services: remote lock/unlock, climate control, start, seat configuration
Intelligent navigation and parking: real-time traffic and location-based services, find nearby parking, automated parking payment
Predictive maintenance: vehicle health monitoring & reporting, proactive maintenance notifications, intelligent dealer services
Fleet management: fleet health monitoring & reporting, fleet system integration, GPS vehicle tracking
Concierge services: in-vehicle payments, mobility services, order a vehicle online
Over-the-air updates: upgrade to latest software, deliver desired features on-demand, push notifications
Data-driven development: data analytics and insights, digital twins/simulations, continuous improvements
The preferred third-party cloud provider for VWAC is Microsoft Azure. VWAC leverages and extends the Microsoft Connected Vehicle Platform (MCVP) to serve the unique and specific needs of automotive brands. In the future, VWAC will have multi-cloud capabilities to support additional third-party cloud providers.
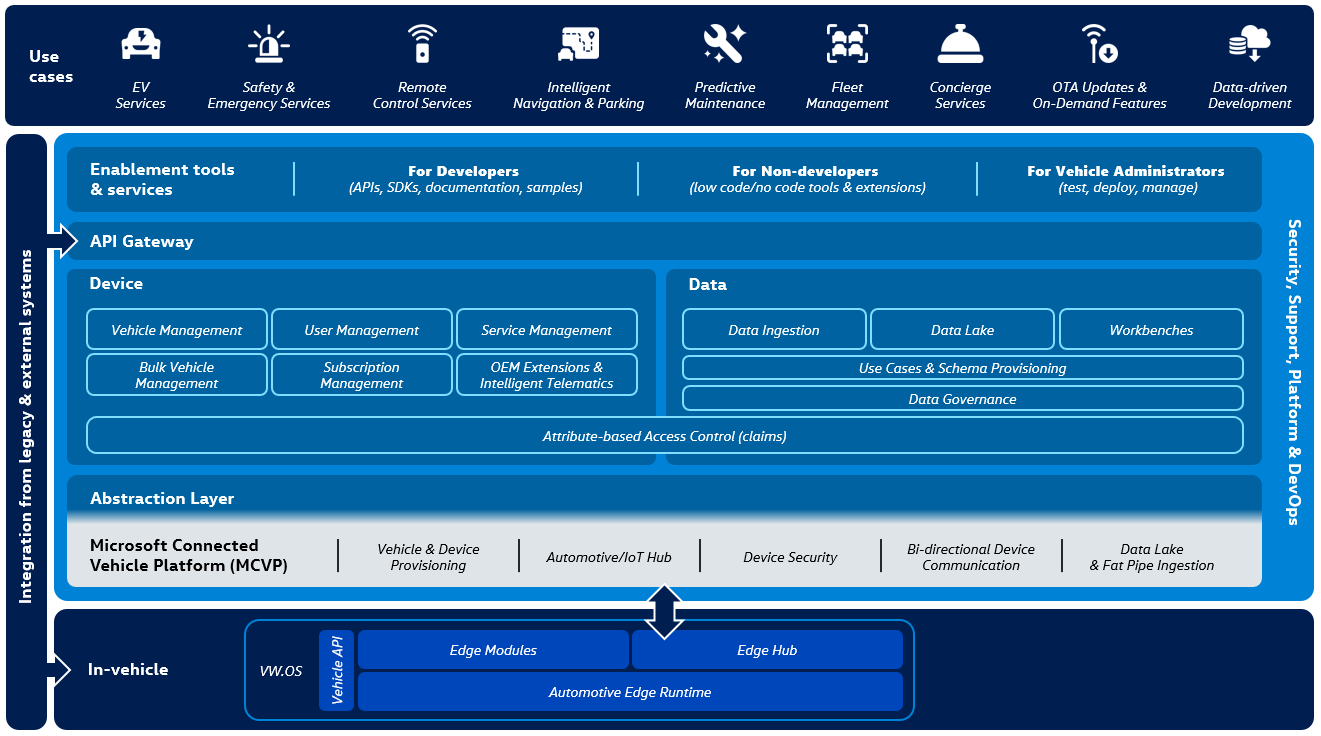
Built to serve all global regions, VWAC will be a complete development and deployment environment in the cloud with tools and resources that enable you to easily deliver cloud-based applications and services for connected vehicles. You manage the applications and services you develop, and VWAC will manage everything else. Some of the capabilities in the following diagram are available now, with the rest available by 2022.
Step 1: Create an account
Visit the Sign in page and click the Sign into Volkswagen Automotive Cloud button. Follow the prompts to complete sign up.
When you sign in for the first time, the service will automatically authenticate you using Microsoft Azure Active Directory, and will grant you subscription access to the VWAC environment or “tenant.”
Your primary and secondary tenant access keys are stored on your Profile page, which is accessible when you are signed in. You can use these keys in the REST API request header:
Ocp-Apim-Subscription-Key {subscription key}Step 2: Explore APIs
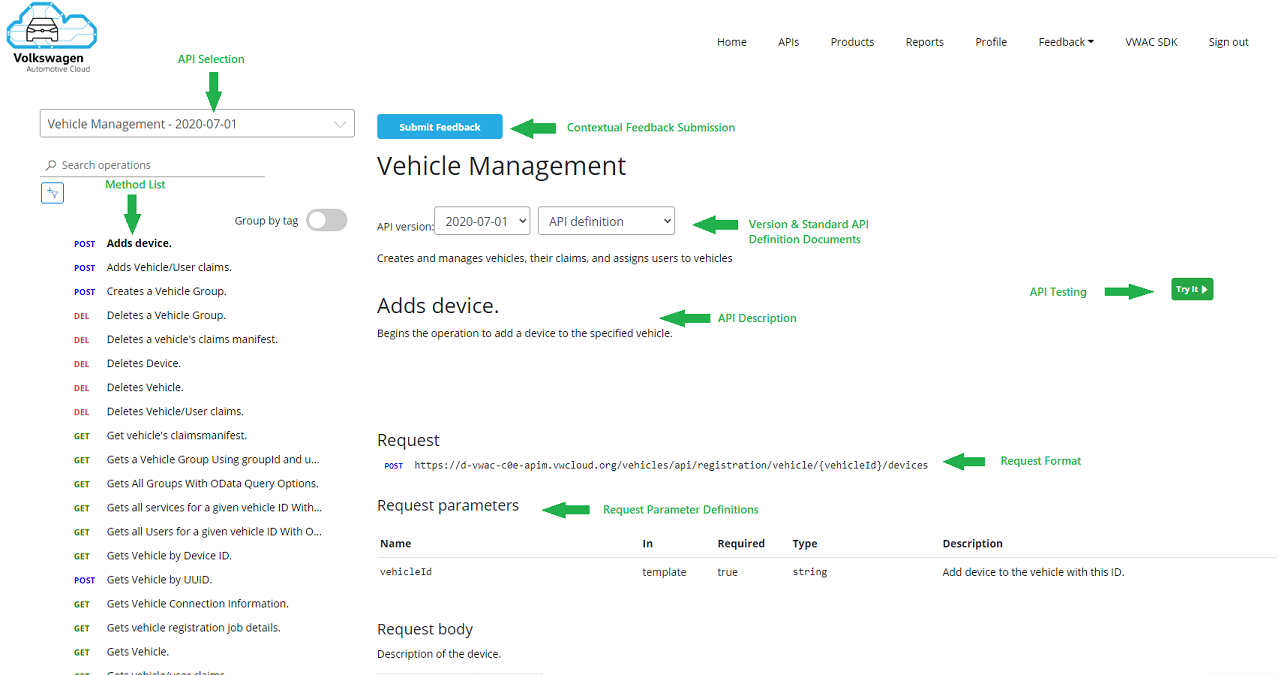
See a list of VWAC APIs and their descriptions on the APIs page. In some cases, the list feature multiple versions of an API to ensure backwards compatibility.
Step 3: Try an API
Select an API to view more detail and download open standard definition documents (Open API and WADL). The Try It function allows you to test the APIs within the VWAC Developer Portal, without having to write code to interact with them.
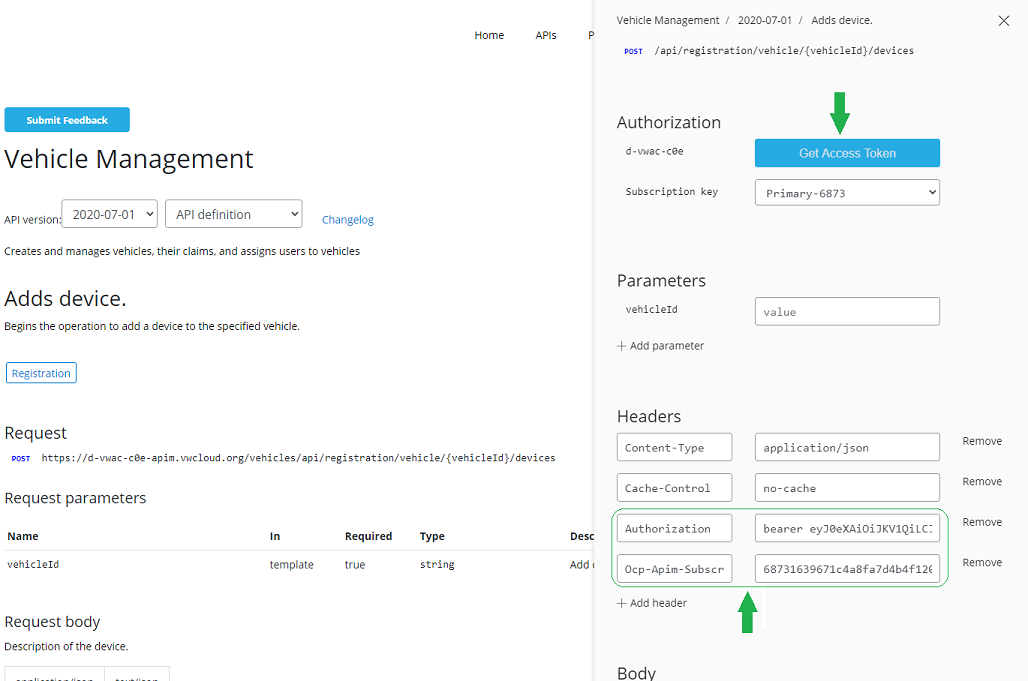
Select the Try It button and a pop-out window will appear.
Click the Get Access Token button to add the required authorization header and token. This security token enables your application to access VWAC protected resources without exposing your credentials, and is only valid for a short period of time.
Configure the parameters, headers, and body of the API call.
Click the Send button to make the API call. This will return the HTTP response for the selected operation from the API gateway.
Note, there are HTTP request code samples available for different programming languages.
Step 4: Register your application
First, register your application using the Azure Portal by following these instructions: https://docs.microsoft.com/en-us/graph/auth-register-app-v2.
If access to application registration is restricted using UI (Azure Portal), you can use the Azure command-line interface (CLI) to register your app.
Sign-in to Azure Portal and start cloud shell.
Alternatively, Open PowerShell, with Azure CLI module. Make sure you connected to correct tenant.
Run Azure CLI command to register new app and generate secret
# Create new app by providing display name
az ad app create --display-name <YOUR_NEW_AZ_AD_APP_NAME>
#{
#    "acceptMappedClaims": null, "addIns": [],
#    "allowGuestsSignIn": null,
#    "allowPassthroughUsers": null,
#    "appId": "454fba65-493a-46a2-xxxxxxxxxxxxxx"
#}

# Generate secret for newly created
az ad app credential reset --id <YOUR_NEW_AZ_AD_APP_ID_(Response_From_Step_Above)>
#{
#   "appId": "454fba65-493a-46a2-xxxxxxxxxxxxxxxx",
#   "name": "454fba65-493a-46a2-xxxxxxxxxxxxxxx",
#   "password": "xxxxxxxxxxxxxxxxxxxxxxxxxxxxxxx",
#   "tenant": "2d8cc149-4c57-462b-a1fb-6e548ffd73bd"
#}
Step 5: Call the API as an app
You can get an access token using client credential flow to make your API calls. Provide the client id and client secret obtained in the request body as shown below. Make sure you provide the proper scope when requesting Access token. The example below is using VWAC INT APIM as a scope.
Access token request:
<VWAC_TENANT_ID> => 2d8cc149-4c57-462b-a1fb-6e548ffd73bd
Operation: POST

URL: https://login.microsoftonline.com/<VWAC_TENANT_ID>/oauth2/v2.0/token

Headers:
Content-Type:application/x-www-form-urlencoded
Cache-Control: no-cache

Body:
client_id:<APP_ID>
client_secret:<APP_SECRET>
scope:api://core-int-vwac-eab-apim-backend-sp/.default
grant_type:client_credentials
Use the access token retrieved from the previous step to make your API calls. Refer to the VWAC APIs for the different operations and their respective end-points.
The example below is showing how to make the request for the GetAllUsers operation.
Operation: GET
URL: https://int-vwac-eab-apim.vwcloud.org/users/api/user?api-version=2019-09-01Headers:Cache-Control: no-cacheOcp-Apim-Subscription-Key: <SubscriptionKey>Authorization: bearer <ACCESS_TOKEN>
Step 6: View usage reports
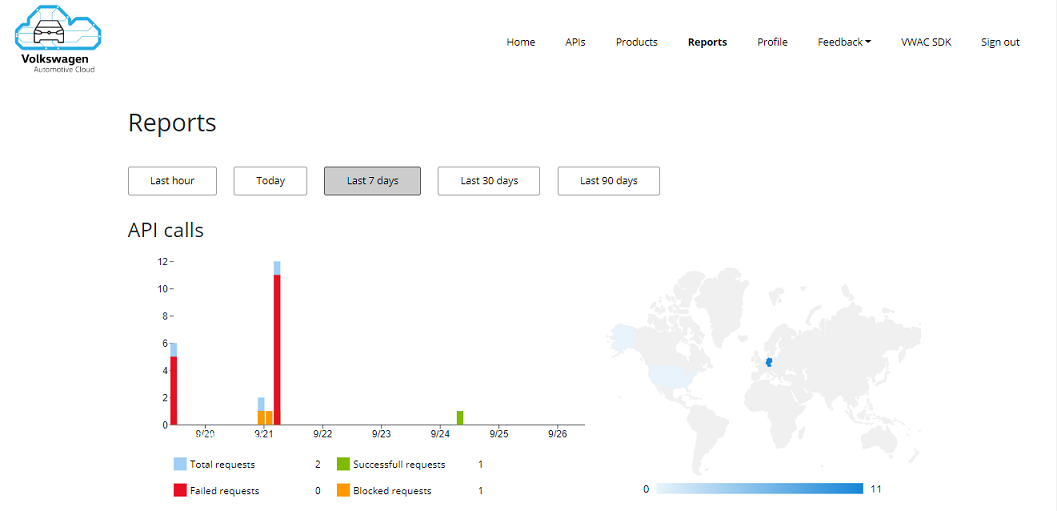
The reports page lets developers see telemetry for all of the products they are subscribed to and consuming. The usage data featured here shows API request data in the broken out by:
API call counts
activity by region
aggregated data transfer
response times
by product & subscription
by API & operation
Share Feedback
Click ‘Submit’ in the Feedback drop-down menu in the navigation to provide feedback directly to the VWAC Product Team.